
Here is part two of my Collagen Induction Therapy post. This time I will focus specifically on the devices to use, the products to use during and after microneedling, and more generally about the very crucial aspects of microneedling aftercare.
Best Devices for At-Home Collagen Induction Therapy
I have tried and been using two types of tools used for microneedling:
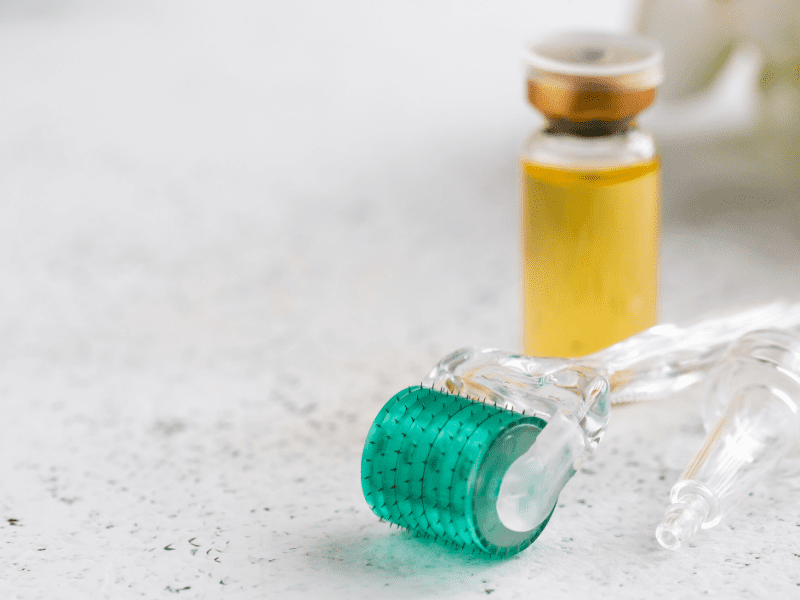
The Microneedling Roller
It’s all about the needles. Get a cheap tool, it will have cheap needles and you either won’t see the effects or, worse, you might injure your skin much more than is needed.

The needles in good-quality rollers are usually made of high-quality stainless steel and sometimes of titanium.
There are benefits to both kinds of metal.
Stainless steel is more sterile but it is not as durable as titanium. Titanium is super durable but might lack on the sterility front. Since the microneedling rollers are inexpensive, I prefer to get the stainless steel and use it up to 5-6 times and discard it. This way I know that I am getting the most sterile tool I can get.
The depth of needles is very important as well. The rollers come equipped with 0.25mm, 0.5 mm, 0.75 mm, 1.0 mm, 1.25 mm, 1.5 mm, 1.75 mm, and 2.0 mm.
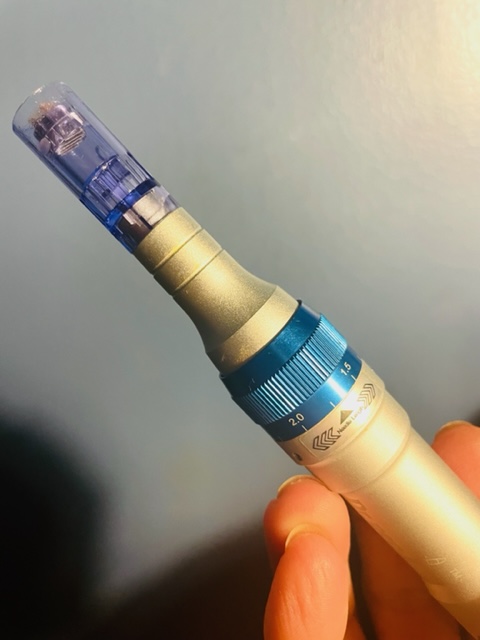
Dermapen
On a Dermapen, the depth of the needle can be adjusted by turning a little knob.

Personally, I would never use anything above 1.5 mm at home. The deeper lengths are best left to be used with heavy numbing and performed in the doctor’s office.
Generally, it is recommended to use needles of specific lengths for specific areas:
Forehead, Nose, Eye Are, Lips : 0.25-0.5
Cheeks and Chin: 0.5-1.0
Facial Scars: 1.0-1.5
Here is my recent roller with a 0.25.
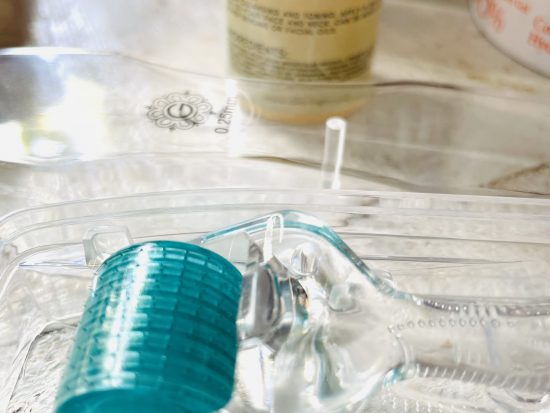
So far, I’ve been using only 0.25 and 0.5 rollers and will be graduating to the next level of 0.75 in a few months. At first, I was using only 0.25, then after a few months, I moved on to 0.5 with no issues at all.
Best At-Home Microneedling Pen
There are many of them on the market and you can find whatever suits your needs and budget by researching online.
My own device is Dr. Pen Ultima A6, and I am very satisfied with it. It truly is an “all-in-one microneedling kit, and it is the best Dermapen for estheticians and home, according to this article.
What Do I Like About It?
- Multiple speeds
- Wireless with rechargeable battery via an USB port
- Comes with 24 sterilized disposable cartridges with various pins (36-pin for general anti-aging, 12-pin for scars, and nano pons which does not cause injury but helps push products deeper into the epidermis)
- Easy to replenish the cartridges at the Dr. Pen website
Here is a little video of me using my Dr. Pen.
How Often to Microneedle?
Using Dr. Pen, the needles go deeper and cause a bit more injury than the roller. My schedule is usually like this:
- Day 1 : Dr. Pen, with 12 or 36-needle cartridge
- Day 3, 5, 7, 9, 11: Dr. Pen with nano cartridge
- Day 12: Microneedling roller
- Day, 14, 16, 18: Dr. Pen with nano cartridge
- Day 19: Microneedling Roller
- Day 20, 22, 24: Dr. Pen with nano cartridge
- Day 25: New cycle: Dr. Pen with 12- or 38-needle cartridge.
How to Use Dermapen?
Dermapen usage is pretty straightforward.
Basically, you need to follow a few simple steps:
- Wash your face thoroughly
- Apply the numbing cream if using.
- Sanitize your cartridge by submerging it for 5-10 minutes in isopropyl alcohol
In the meantime, prepare your space:
- Set out a clean paper towel on the desk or whatever surface you are using.
- Place a mirror in front of you
- Prepare a bottle of your “gliding” gel. More on this below. I place mine in a little bowl and have a sterile brush ready to dip and spread on my face (to avoid using my fingers)
- Put on a set of sterile rubber gloves
- Attach the cartridge to the dermapen
- Set the needle depth (see the guide above)
- Remove the numbing cream if using.
- Apply the gel on your face and start needling.
I like to start with the forehead since it tends to be the most uncomfortable. Then I move on to the chin and lip area, and lastly, I move to each cheek. Because there is more fat underneath the cheeks, you can go for more depth here. Try to keep the skin as tout as possible so that the needles can penetrate.
Place the pen perpendicularly to the skin and start gliding up and down in one direction, no more than three passes per area. Then change direction in a crisscross manner. (you can also glide in a circular manner, but personally, I find the crisscross easier)
Move to other areas and keep applying the gel to every new area prior to needling.

What to Expect?
The treated skin will get slightly flushed and possibly appear a bit swollen. It might look like a minor sunburn for a bit, but no longer than a few hours.
Make sure you let the redness fade and the swelling go down without attempting to cover it with concealer or makeup.
While you microneedle where the skin is sitting on the bone like the forehead or on the nose, you might see a drop of blood. If so, wipe it with a clean cotton pad. This is nothing to worry about.
Best Products to Use During and After Microneedling
Microneedling aftercare is as important as the procedure itself.
What to use for the “glide”?
During microneedling, you need a “gliding” agent. This is especially important when using Dermapen.
For the roller, you can go dry during the needling, and then apply your serum afterward.
The best product to use during microneedling is a Hyaluronic Acid serum. The whole point of microneedling is to open up the skin and bring the active ingredient in. Hyaluronic acid can hydrate the skin from within so much better during a microneeding session than without.
Microneedling aftercare tips
After microneeding, there are some products that are best to use and some that should be avoided for a few days. Allow your skin some time to heal and recover before bringing back your standard skincare routine.

Use:
- A gentle cleanser (link)
- A non-alcoholic toner (a soothing hydrosol might be best)
- Reapply hyaluronic acid after microneedling
- Lots of Sunscreen for at least three days after
Avoid:
Because microneedling works by creating tears in your skin, it will make the skin more prone to irritation in the first few days afterwards.
This is why I suggest refraining from using ingredients that might irritate the skin:
- Anything harsh
- Highly concentrated serums
- AHAa and BHA (glycolic acid, salicylic acid, and other direct acids)
- Alcohol-based toners
- Vitamin C (use with caution)
I stay clear from these for two to three days after a microneedling session.
Because your skin is actively healing from the tiny holes caused by microneedling, using makeup after a session would clog your pores and counteract the effects of the procedure. Avoid make-up for 48 hours after a microneedling session.
The Most Important Part of Microneedling Aftercare
The most important part of aftercare is sunscreen. The skin after the microneedling session is much more sensitive than before and getting a sunburn would not only hurt, it could also lead to scarring and hyperpigmentation.
Using sunscreen is the best preventive anti-aging measure in general, but after microneedling it is even more important.
Final word
I have to say, I love using my roller and dermapen as part of collagen induction therapy.
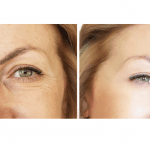
When compared with a laser treatment or high-percentage acid peels, this procedure is easy, effective, with minimal downtime, and non-existent side effects if you follow the micro-needling aftercare instructions.
I would highly recommend it to anyone looking for an effective modality to add to their anti-aging skincare routine.
Need help shopping for the right tool?
This post contains affiliate links. If you click on one and purchase the product I will get a small commission at no additional cost to you. For more info see the Terms and Conditions Page. Thank you for supporting Oko-Logic.
Here are the tools I use and highly recommend:
Dr. Pen Ultima A6 with cartridges

ORA Deluxe Microneedle Dermal Roller System 0.25mm
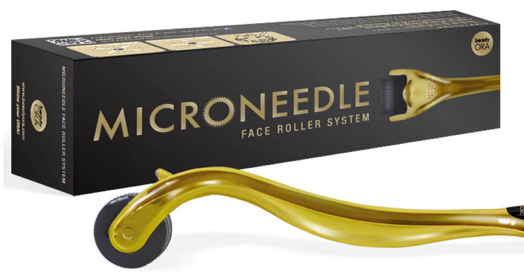
ORA Microneedle Face Full Body Roller Kit (6 piece)

Hyaluronic Acid Serum
Before you go, check out this e-book filled with DIY recipes for easy and effective handmade skincare.


 5 Solid Reasons Why You Should Try Collagen Induction Therapy for Your Skin
This is absolutely fascinating, thank you for this thorough description of the process…still thinking about it ….
Interesting product, I will try to check this, I enjoyed reading your part 1 and this second article has been informative too.
I guess that old saying “no pain, no gain” is true. This is an interesting technique to reduce wrinkles and fine lines.
Luckily it doesn’t really hurt that much, at least not with the smaller needles:)
Oh, my! I would love to have my skin from twenty years ago, but so many needles… not that I have a phobia:)))
I enjoy reading your post for the amount of information you provide and the detail you go into.
Haha! They do not hurt really, but I can understand the hesitation.